Inspired by a pumpkin past, I challenged Alex and William to re-visit their face carving stylings, but this time with someone we know and love:
Happy Stimpkin Day!

Here he is, when he is not a pumpkin, but a dedicated and inspiring physics, and history teacher, and most honorable Paradox coach and mentor. That's right: I threw in a Robotics plug!
Team Paradox is full of good people, exceptional teachers and mentors, and I thought for sure I would find a post specifically about some of them, like George S… evidently I made George S. and robotics synonymous, which is appropriate, but he deserves to be singled out. Like I have said before: This man is FIRST. He teaches it, lives it, exudes it, and his students love him for it.
And it is the team's great fortune that there is more than one dedicated and awesome teacher looking out for robotics and the Paradox. Jason B., I have just the picture of you that would make a pumpkin glow!

Making a pumpkin into a favorite teacher takes planning, daring, humor, and a team effort. Gee, robotics really does prepare us for all of life, you know?
Step One: Find a good pumpkin. Sound, steady, dignified. It should already exude those qualities you plan to accentuate from your subject.

Step Two: Someone has to get in there and clean things out.
In deference to the beret, a signature accessory of Mr. S., I cut the top in a beret-like shape. Trust me, all of this is thoughtfully designed.

Maria, resident Mini-Paradox, was more than happy to help with the scooping.

Now comes the pattern. This picture came from the last all-nighter of the 2009-2010 build season, when the robot had to be finished and crated before 8 am. Mr S. looks to be in good spirits, right? Good spirits is a specialty of 2102 Team Paradox.
Step Three: William played with the original photograph, converting it to black and white, then he used the threshold tool in Photoshop to contrast and highlight Mr. S.'s features.

Step Four: Transferring the image onto the pumpkin.
Someone wished to remain anonymous for as long as possible. Shy. This actually provided some hilarious moments, when we realized how much trouble we could get in if any of our intentions were misinterpreted.

This part is important and time consuming, and also causes hand cramps...

which is why it is so nice to have two or three people working on it.

William did transferring, and I did transferring, and Maria offered to do transferring. Gently poking the tiny holes in the pumpkins skin created an outline so that we could then carve away the lighter sections.

Step Five: Carving away the light sections. This is the part that can cause you to lose hope, give up, surrender, quit. For one thing, we did not have good tools. Again. So, just like when the boys did this three years ago, we were using a variety of inadequate kitchen gadgets, and losing confidence in the outcome.
Step Six: Never give up! Never surrender! Seriously. Working up close with the pumpkin and concentrating on the details in the pumpkin flesh makes it impossible to appreciate the impressionistic effect of this kind of pumpkin carving. So, it pays to be patient, and to see it through to the end.

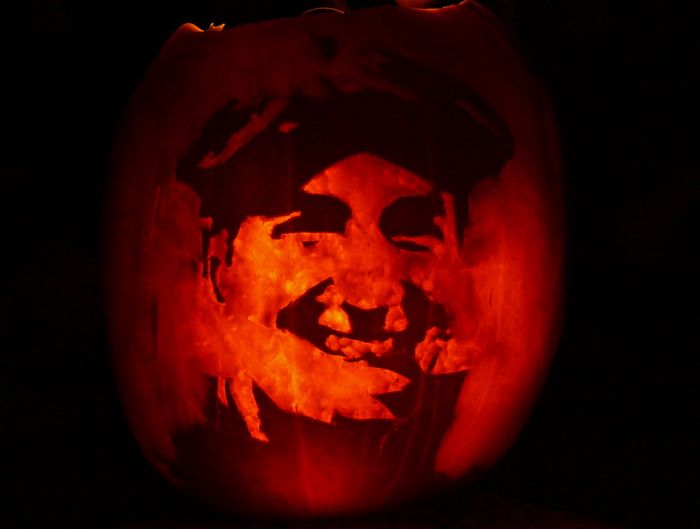
Because when you turn out the lights, and illuminate the pumpkin from within, then step back...
It works. Somehow, it works, and suddenly you see your teacher glowing back at you, and you can almost hear him asking, "If you're on a frictionless lake of ice, with nothing but you and a cat... what do you do?"
1 comment:
I remember being blown away by this last year - thank you so much for posting again. I am STILL blown away by it!! Axxx
Post a Comment