Tuesday, March 27, 2012

Love and Rockets and Automaton


More plans for Maker Faire!


Okay... this proposal is a big challenge, fun too.
Automaton, anyone?
The application is in!

Maria :: Love and Rockets and Wool


"My name is Maria, and I am seven. I am a Young Maker from "Love and Rockets" Young Makers Club. Last summer, someone taught me how to make a bracelet from something soft and fluffy... wool! Now, I know that wool comes from sheep, and when sheep get their wool shaved, then we can use it to make all kinds of things, like toys and jewelry, and yarn for knitting. Wool batting feels soft, it even smells like sheep, and it's fun to make things with wool. I would like to show you how you can make a bracelet with wool batting."

Well, she had to shorten her description, because there is a 250 character limit. But she was sure to include "Love and Rockets, Young Makers Club!"


Maria, with some help, is filling out her application so she can demonstrate at Maker Faire!


Done! Maria's application is in, and she'll hear from the team at Maker Faire in April!

Friday, March 23, 2012

Make Hoops and Music!

Last summer we made hula hoops, and music.
Maker Faire is coming up. I wonder what new inspiration we'll bring, and come home with!

Where does inspiration begin?

And where will it take you?


In May we went to Maker Faire, and ten feet through the entrance gate we were already fully immersed in Maker Faire fun... namely, the hula hoops. Someone brought giant hoops to share and sell. Have you ever seen them? They are heavier and larger than the typical toy store kind. Whenever I saw them, and the gifted women who were whirrling and twirling in them, I always thought, those must be for good hoopers. It turns out I was not understanding the physics. Hula Hoop physics. Suki is a good hooper, and she was having a great time. Maria picked up a hoop and lo! she was pretty good too! The greater mass of the heavy hoops keeps them in motion, so they are easier to use than skinny-cheapie hoops! I thought this was very promising... and then I thought about all kinds of other things, and sort of forgot all about my future as a stunningly gifted hula-hooper.


::Cody and Tamsyn::

Until... until Elizabeth Mitchell was a guest blogger at Soule Mama, and suddenly I was utterly smitten and captivated by hoops all over again! And this time, I learned that not only are big hoops easier to use, but that they are easy and fun to make at home!

JOY!
Inspiration!
Party.


::Emma is softening the end of the 10' poly pipe by holding it in boiling water::

The video that Elizabeth Mitchell and Storey made is charming and sweet, like their music. I just wish our neighborhood hardware stores were as well stocked as theirs is. I had to visit four stores before finding one that could order the supplies for me.

This is what I bought:
100' of 3/4" Polyethylene Pipe, ideally at least 100 psi, and I wish it were a bit higher and also 1", but what we got works!

10 Internal couplers... they connect the ends of the poly pipe

Duct (Duck) tape and or electrical tape... for prettyness.

This grocery list will get you ten hoops, so call your friends and invite them over. The cost for poly pipe and couplers came to thirty-six dollars... not a big total per happy-hooping friends!

You will also need a pot of boiling water, and pipe cutters. Watch the video... it really is that easy!


::We did figure out that holding the poly pipe in the hot water for at least a minute and then forcefully getting the connector in is key to a good tight fit::


::Always Paradox, Andrea is preparing her hoop::

We basically cut everyone's ten feet long, because I was worried about having enough. I made mine last, and there was plenty extra, so I asked Suki to advise me about the size. Her suggestion is to make it taller than from the ground to your waist. My hoop I measured from the bottom of my ribs, which was a little more than ten feet.


::Cristina came from the beach... she had a total Aloha day!::

One more thing! Rice. For the fun swish-swish-swish effect we funneled in a generous tablespoon of rice. Simple trick with a lovely sound, like a rainstick.


::Emma and Lonnie and Andrea::

I dunno... I seem to make things big. Know what I mean? Like, okay, I want to make a hula hoop, but why not ten hula hoops and friends, then we can play ukuleles, and make shave ice with homemade strawberry and lemon syrups? Big, like that. And why not? Sometimes just sharing with a friend or two makes a simple something, something special.


::Alex went for sweet coffee over his shave ice::

I made strawberry syrup, and lemon syrup... pureed fruit, sugar, water, and sugar. As they say in Hawaii, It was ono. This is a NO DYE zone, and having dye free shave ice is a real delicious treat.


::Jess likes the strawberry::


::Lemon and strawberry for Jesse and Jacob::

::The strawberry syrup tastes like strawberries! Ono!::


::Maria covered her hoop in all kinds of electrical tape colors::


We made our hoops. We decorated our hoops. We played with our hoops. We ate shave ice, and had seconds, too, and then we kicked back. The rest is just memories of hauoli.


::WOW... Word of the Week: Hauoli means Happiness::

Tuesday, March 20, 2012

Make with LEGO!


Check out Max's cable car!

Sometimes I overhear parents grumbling about LEGO bricks... their kid's obsession, stepping on a brick, finding the toy everywhere. Personally, I can't find the voice to complain about LEGO, but some people, standing in the toy aisle, get very vocal and heated about their anti-LEGO-ness. I just don't get it. LEGO bricks are a toy that perfectly exemplifies endless opportunity: for fun, for learning, for creativity, for engineering, for design, for entertainment, for ingenuity, for invention. For fun... did I say that, already?

Max has been sick. Long nights coughing, sad mornings with a sore throat, and general misery. We've been treating him with warm teas, warmer blankets, and tenderness. I decided to bring home something extra-healing, a bit of unexpected fun in the form of new inspiration.


I happened to be next to a toy shop, where I found Crazy Action Contraptions, a LEGO kit with parts and an ideas book. We hardly need more LEGO parts, but key Technic pieces and step-by-step instructions for new contraptions could be a nice distraction from being cooped-up and miserable. And the look of delight and surprise on Max's face confirmed it... I found the LEGO Cure!

The kit has specialty parts, but not a motor. Max got busy making a push button car, and some of the other devices, and then, with his gears warmed up, he began thinking of something more elaborate, challenging...


By adding a motor to a cable car he designed, he was able to build a Crazy Action Contraption that moved on its own power. He ran nylon string between posts, and ready-set-action! his cable car was on the move!


He's feeling better, on the mend, back to school. Yesterday, after school, he made a much longer line from the porch to the metal fence, and sent his cable car across the yard. More plans, new ideas, making, and healing... I cannot deny, I love LEGO, and the kids who play with them.

If you have a grade-school age child who loves LEGO, design, fun challenges, and learning about science, technology, engineering, art, and math (STEAM), then please visit FIRST LEGO League! FIRST is For Inspiration and Recognition of Science and Technology and together with LEGO, they have an inspiring and dedicated program to serve young engineers and scientists.

Monday, March 19, 2012

Owl Make An Old Shirt New!


Young Maker, Maria, was invited to her cousin's owl themed birthday party, and this gave me the notion to finally try a project I've been eager to attempt... painting a stencil onto a T-shirt.


Painting a stencil onto a T-shirt is a creative project I've seen around the Internet, many times, but I remember where I saw it the first time, and that was at Amanda Blake Soule's Blog, SouleMama, and in her book "The Creative Family." It's almost embarrassing to realize how long it took me to make the time, and muster the courage to try this, because it turns out it is really an easy project, and a lot of fun, too. It took me almost almost four years, from the time I first read "The Creative Family" until we got creative with an old shirt, some freezer paper, and a bit of paint. I hope you won't wait as long as I did to give this a try!


Supplies and Suggestions:

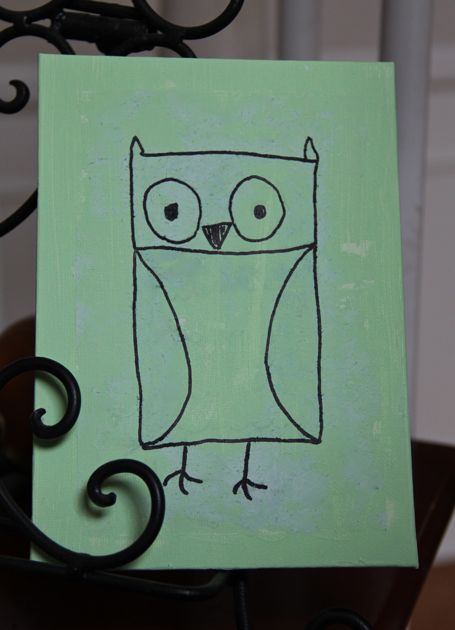
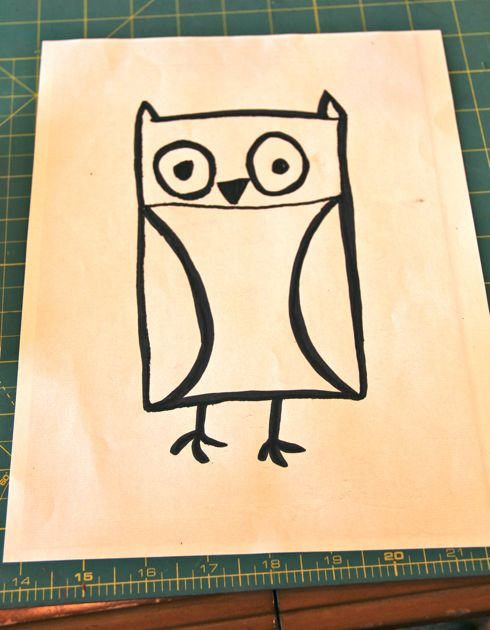
1. One simple, line drawing, or a silhouette. I chose an owl painting of Maria's.
2. Maybe photocopy the original drawing to get the desired size, and to protect the original. I increased the size of the owl to "fit the page."
3. Sharpie, or any dark, heavy, permanent marker
4. A precision knife, like an X-acto.
5. A self healing cutting board is nice, or any surface you can afford to damage when cutting out your stencil.
6. A T-shirt, apron, tote bag... something to beautify! I tried this on a shirt that was the victim of chocolate ice-cream, and poor laundering habits.
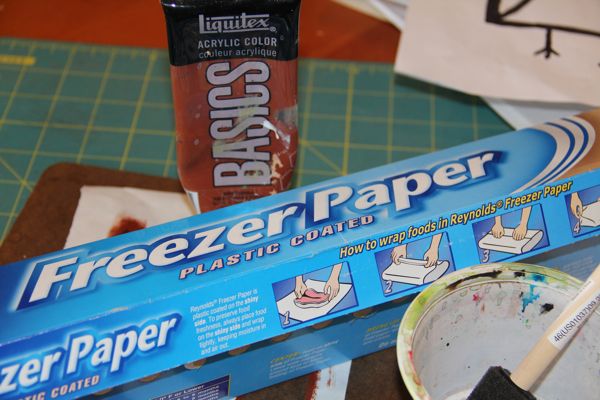
7. Freezer paper. See picture. This stuff is at the market, and it's wonderful to have on hand.
8. An iron. Set it for cotton, and turn of the steam.
9. Acrylic paint. One reason I hesitated to attempt this project is that I worried about having the "right" kind of paint, but then I realized we have been making accidental acrylic paint art on our clothes for years... and even the cheapie kind of paint we have is permanent, and washer proof.
10. A foam brush.


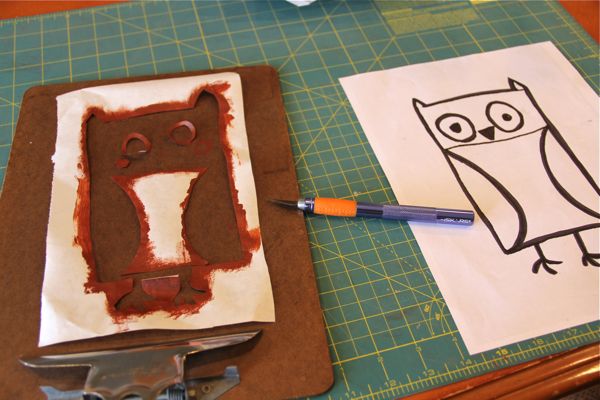
Freezer paper on the left, already cut, and painted. Photocopied drawing on the right. I'm sorry: I took this picture after the fact, but here's what to do...

~With the photocopy of your art, thicken the lines with a black marker. The bolder the image, the easier it will be to first trace, then cut away parts, and have nice clean lines for your finished image.

~I put the bold, photocopied picture under a piece of freezer paper. The freezer paper should be shiny side down. You are going to trace, with the black marker, the original drawing, onto the dull side of the freezer paper.

~Freezer paper is sturdy, nice to work with. Think about the part of the picture you want painted, and the part you want unpainted... this sounds obvious, but I found it a bit tricky once I started cutting away parts. I figured out, the hard way, that the eyes and small details would be cut away... but that's okay... save even tiny bits, because the freezer paper will iron onto the fabric!


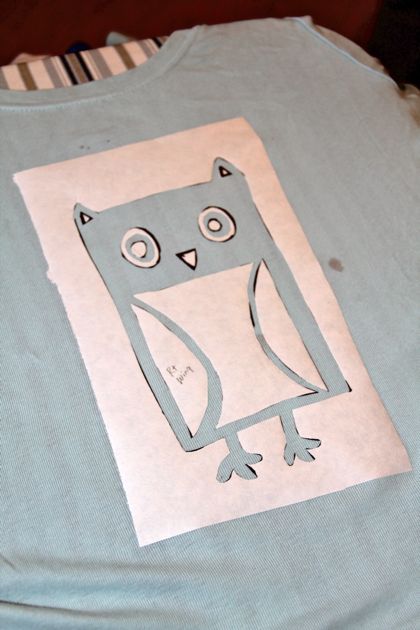
~Do you see what I mean? I saved the tiny cut-out beak and pupils, and with the iron set on the cotton setting, without any steam, I pressed the freezer paper, shiny side down, onto the T-shirt. Don't slide the iron around. Just for a few seconds set the iron on the shapes and they will cling firmly to the fabric. Now we paint!
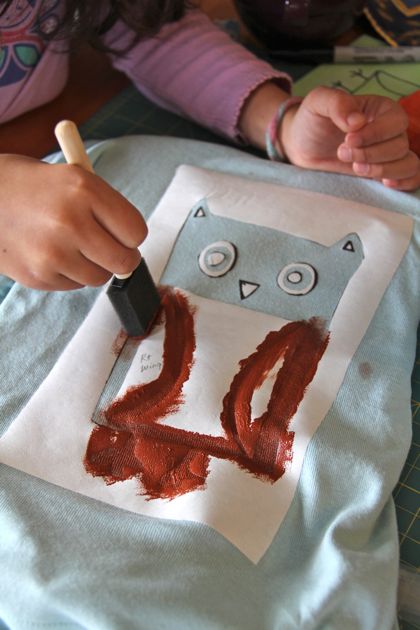
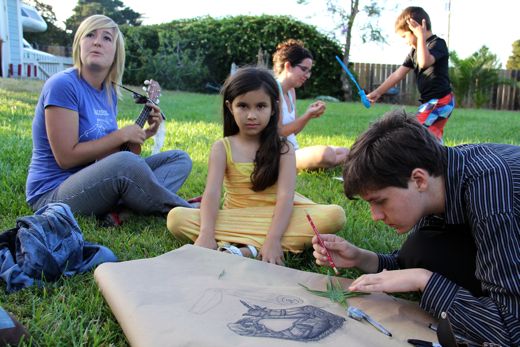

~Using our basic brown, acrylic paint, and a foam brush, Maria and I took turns dabbing on the paint. We had a clip board inside the shirt, to keep the paint from soaking through. Don't let the paint be watery or too heavily applied... you are basically just staining the shirt.


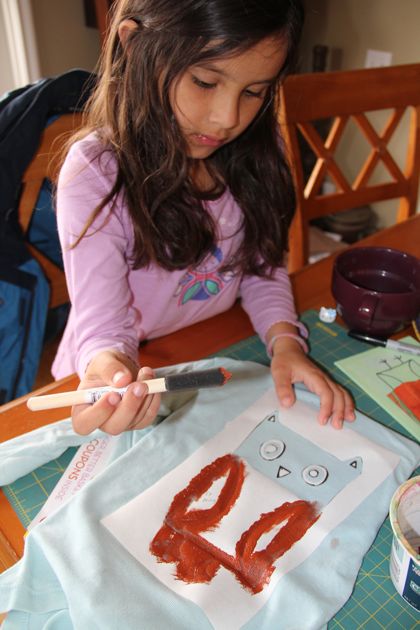
~We kind of pushed the paint into the fabric, taking care not to let brush strokes push the freezer paper off. The freezer paper never budged! The paint went on easily. And because we were anxious to see this done, and have Maria wear her new shirt to the party, I brought out the hair dryer. I let the hair dryer dry the paint... it took only a few minutes.


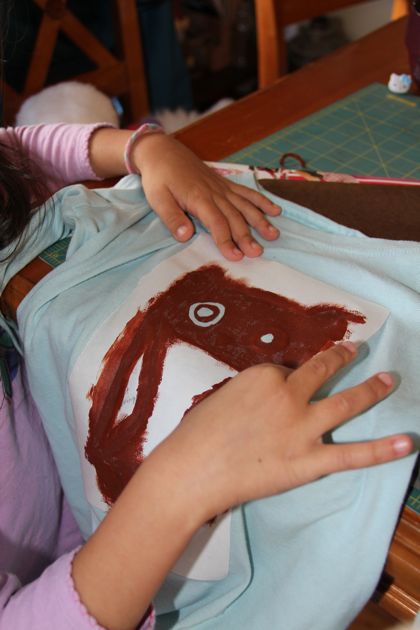
~The fun part. The reveal! When the paint was dry to the touch, Maria peeled off the freezer paper. It worked! It was so easy, and there was no smudging, or seeping of paint. Wow!


Ta Da!

~I may iron it, before I toss it in the wash... just to get the paint set real good, but otherwise it seems to have worked just fine. 
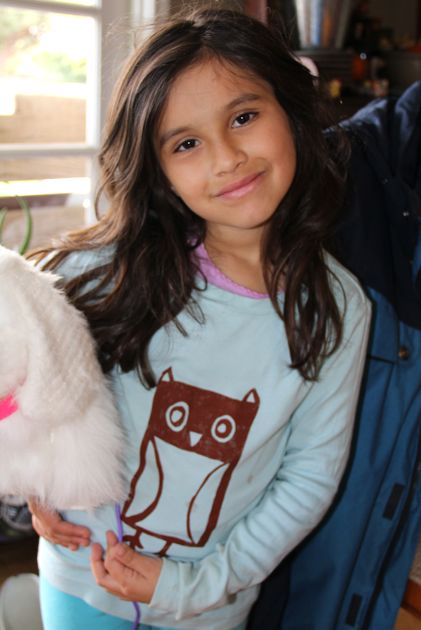
This sort of easy-creative success makes me giddy.


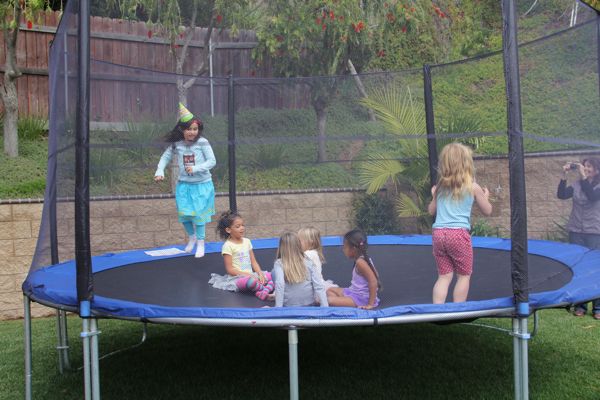
Maria's old shirt is new, and party-ready-bounce-proof!
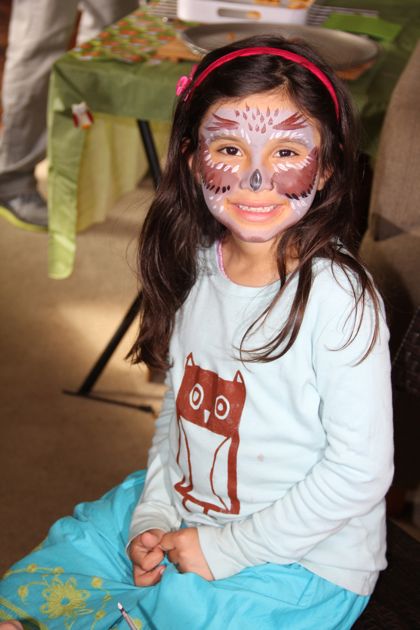

Whoo-Whoo for Maker fun!