Monday, January 4, 2021
Bench Making
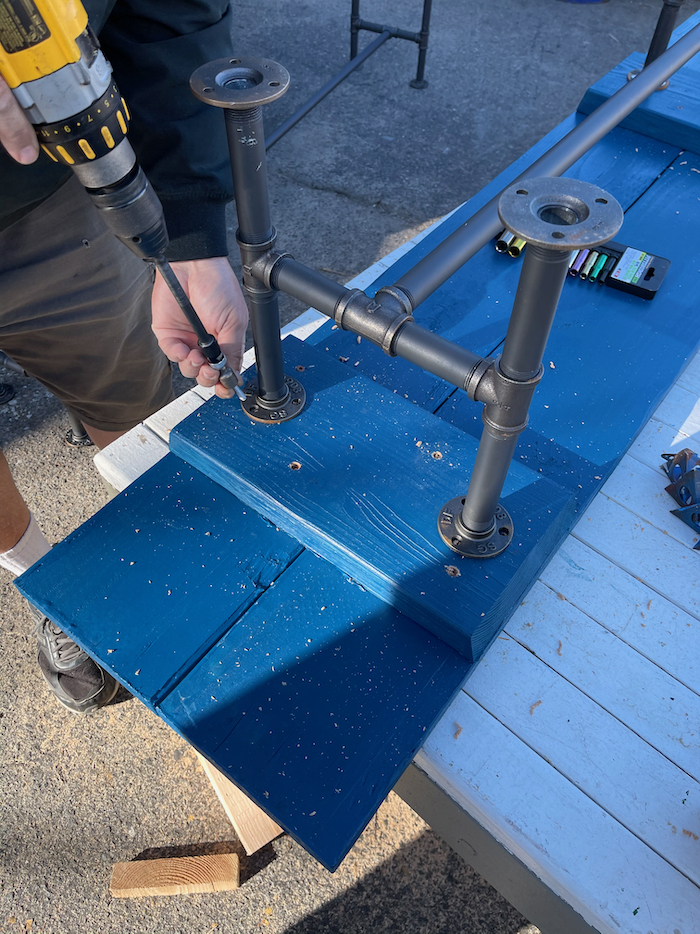
The table was a free-cycle find we came across on a bike ride about two months ago. It could not be a nicer fit for the new deck... a long and deep, sturdy table with fitted pipe legs, and heavy wood planks. It looks great! Since the deck was built with making events in mind, we want to keep it both open and inviting, with space for gathering and doing projects, but without crowding ourselves. This is why Alex suggested we don't look for chairs to add to the table. It would be too many pieces of furniture to buy, and to deal with. Then Natalie thought of benches... two pieces of furniture that could seat many visitors, and be easily tucked out of the way when not needed. They could be versatile! The idea stuck, and Geoff, William, Alex, and Max got to work on a design, and making!
To compliment the style of the table, Geoff looked for steel pipes to make legs for the bench, and he was happy to find Brooklyn Pipe. Actually, he started at our local hardware store, but the limited selection is what made him do a wider search. Some of the pieces had to be painted, so we could make them look a little more uniform. Technically, it's a bit mismatched, but that kind of suits are aesthetic anyway! I won't get too detailed in describing all of this. They made measurements, came up with a configuration, and then called Natalie over to decide on a paint color, and she went with Nocturne Blue, by Behr; same as our picnic table (maybe?)
William painted the 2"x8", 8' boards. It's Nocturne Blue. But. Maybe not. Our Nocturne Blue looks nothing like it shows on the website. Nothing. And it doesn't even match the other picnic table we were looking at when we chose to paint the benches blue, too. What the heck? It's not a disaster, but I suspect we will be going over the benches, someday, with a more subdued blue.
Using pipes like this is something new for us, and we like it. We are thinking of using the extra parts to make shelves, maybe for the blacksmith shop.
Now we have two benches, and seating for ten, or more. They are very stable, and have a nice, deep seat. We will be able to use them at the table, or pull them away for sitting around the perimeter of the deck... versatile, like we said, and that's good for us. When we can get back to hosting making events, this new space and accomodations is going to be really nice, like an extension of our shop. We look forward to all the making, playing, and sharing we will be able to enjoy.
Labels:
Alex,
Construction,
Design,
Geoff,
Maria,
Max,
Metal,
Outreach,
Shop,
Thrifty,
William,
Wood
Tuesday, December 15, 2020
Making Paper Stars
Do you want to make some paper stars?
Supplies
Paper bags... the more you use, the harder it gets to cut. These were made with eight bags.
Glue... I used a glue stick. But white glue, or hot glue would work, too.
Scissors... sharp ones help.
Paper clips or... these are to hold the two ends together when you open the star for display. You could glue the ends, but then it will be hard to store. I couldn't find any paper clips. (Baffling. They are here. We can't not have paper clips.) I used bobby pins.
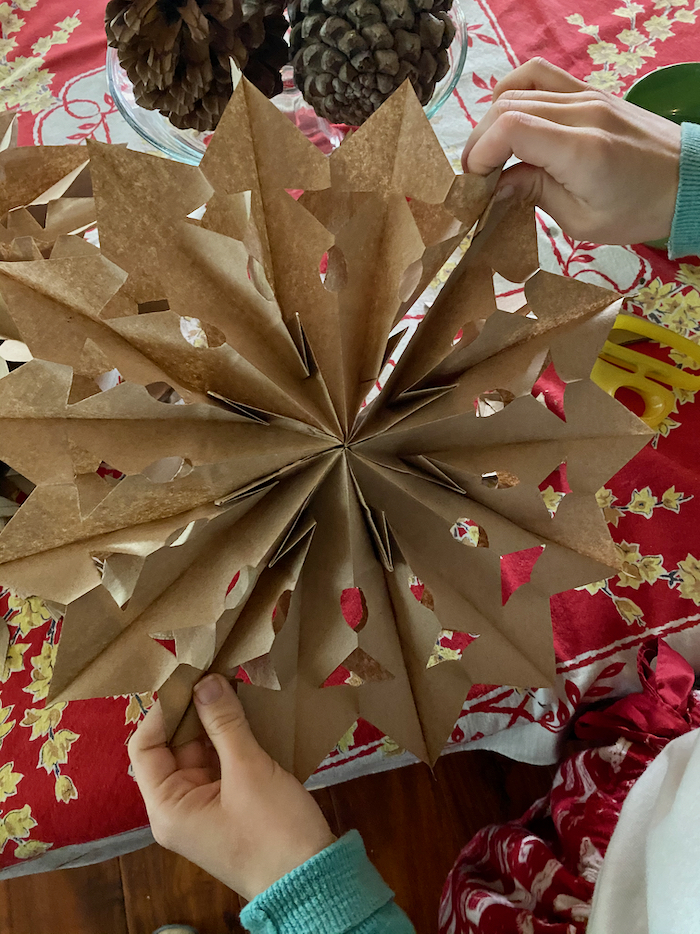
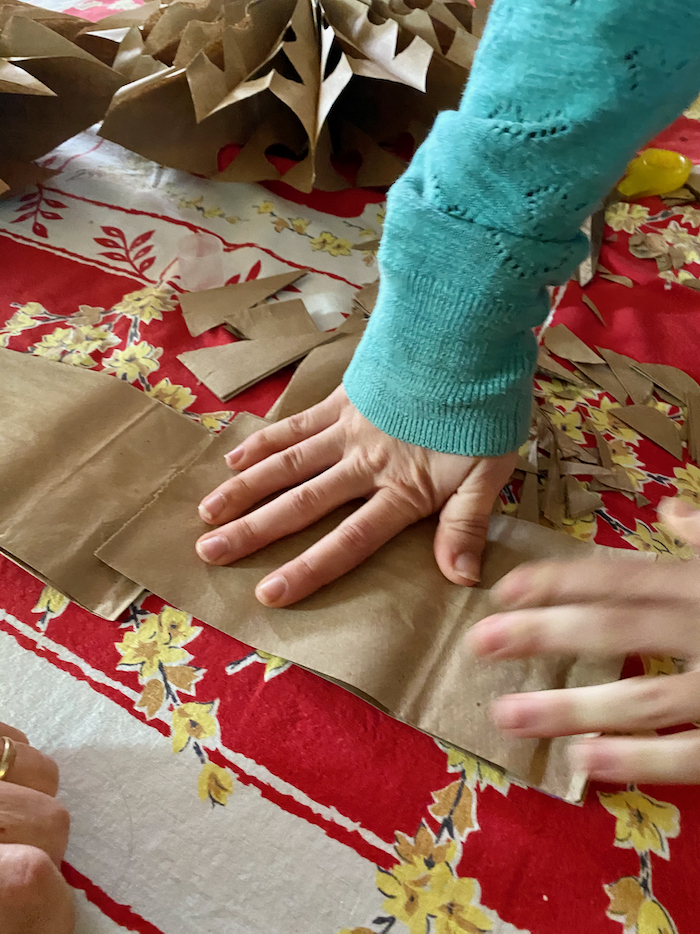
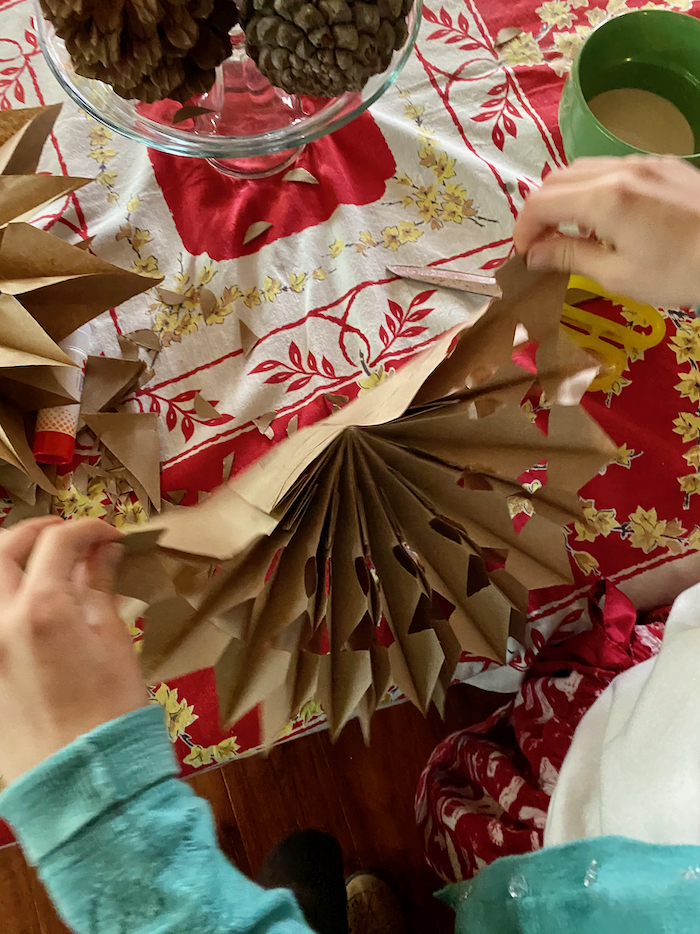
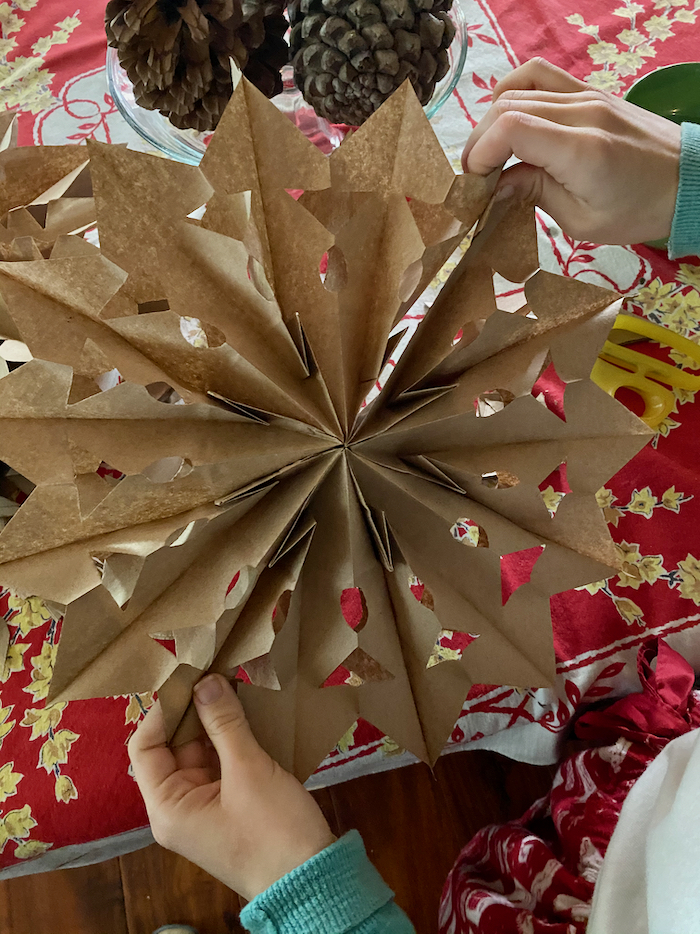
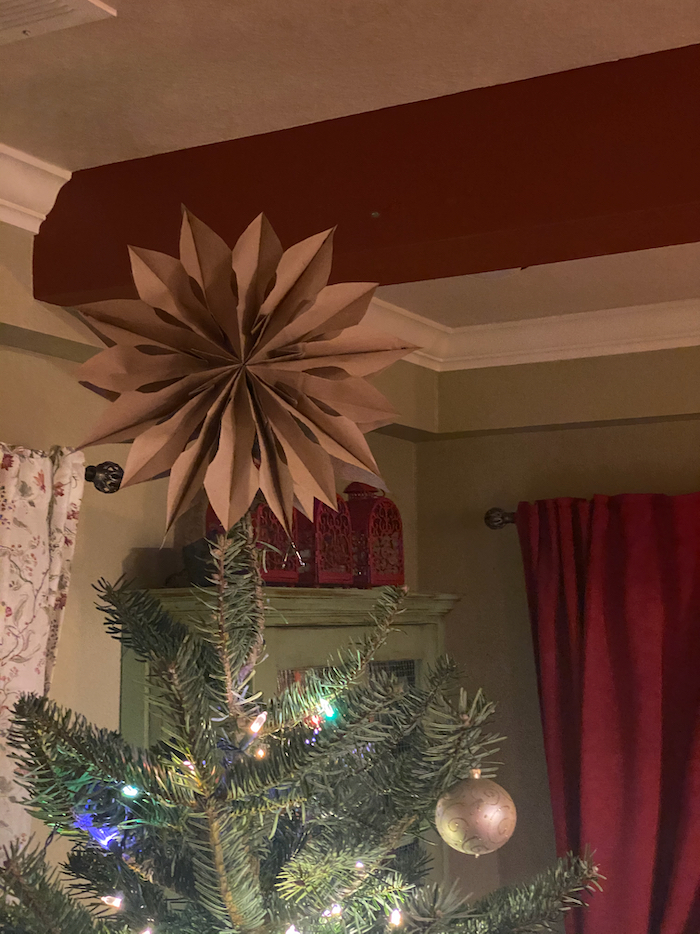
Some string, or thread... anything to tie to the star for hanging. Start by counting out your bags... 7, or 8, or 9, or 10. It's your choice. Lots of bags make a fuller star, but I didn't want to be struggling cutting through all those layers. I think 8 was a good number. Face them flat/smooth side up, and make a generous width of glue from the opening end, down the center of the bag, to the bottom, then add an equally wide strip of glue across the bottom. The T should reach the edges of the paper, so the points stick, and the center holds together, too. Now, you are ready to lay the next bag on top of the first one. Line up the second bag, with the folded bag bottom going down. When you have the two bag pressed together, get out the glue, and make the next T. Press the next bag, and repeat until all of your bags are layered and glued together. I did mine last night, and let them sit for an hour, to dry. I cut two stars, and saved one stack of glued bags for Maria to cut this morning. This part is like snowflake cutting. And the first cuts are from the edge and up to the center of the bag, to make a point. Maria is making the second cut to finish the point of the star. Our bags came with a lot of printing, which mostly gets hidden when the whole star is pinned, clipped, or glued together. Now for the cuts on the sides of the bag, also like cutting snowflakes. The bigger the cuts, or the more of them you make, the more light will come through. We didn't cut near the bottom, where all the layers are thicker with the bag bottoms folded up and glued together. Time to open the star! And when you pull up both ends and bring them together, use either glue, maybe staples, or if you have paper clips those will make your star easy to store for another day... attach the two ends together, and ta-da! You have a paper star! We are making more to hang over the mantle. They would be pretty in a window, where light can shine through.
Supplies
Paper bags... the more you use, the harder it gets to cut. These were made with eight bags.
Glue... I used a glue stick. But white glue, or hot glue would work, too.
Scissors... sharp ones help.
Paper clips or... these are to hold the two ends together when you open the star for display. You could glue the ends, but then it will be hard to store. I couldn't find any paper clips. (Baffling. They are here. We can't not have paper clips.) I used bobby pins.
Some string, or thread... anything to tie to the star for hanging. Start by counting out your bags... 7, or 8, or 9, or 10. It's your choice. Lots of bags make a fuller star, but I didn't want to be struggling cutting through all those layers. I think 8 was a good number. Face them flat/smooth side up, and make a generous width of glue from the opening end, down the center of the bag, to the bottom, then add an equally wide strip of glue across the bottom. The T should reach the edges of the paper, so the points stick, and the center holds together, too. Now, you are ready to lay the next bag on top of the first one. Line up the second bag, with the folded bag bottom going down. When you have the two bag pressed together, get out the glue, and make the next T. Press the next bag, and repeat until all of your bags are layered and glued together. I did mine last night, and let them sit for an hour, to dry. I cut two stars, and saved one stack of glued bags for Maria to cut this morning. This part is like snowflake cutting. And the first cuts are from the edge and up to the center of the bag, to make a point. Maria is making the second cut to finish the point of the star. Our bags came with a lot of printing, which mostly gets hidden when the whole star is pinned, clipped, or glued together. Now for the cuts on the sides of the bag, also like cutting snowflakes. The bigger the cuts, or the more of them you make, the more light will come through. We didn't cut near the bottom, where all the layers are thicker with the bag bottoms folded up and glued together. Time to open the star! And when you pull up both ends and bring them together, use either glue, maybe staples, or if you have paper clips those will make your star easy to store for another day... attach the two ends together, and ta-da! You have a paper star! We are making more to hang over the mantle. They would be pretty in a window, where light can shine through.
Friday, May 22, 2020
Virtually Maker Faire 2020 Tonight!
Learn our Make story, and many others at Virtually Maker Faire!
Around the world makers have been rallying, rising up to solve shortages in medical supplies and equipment, turning makerspaces into micro-factories, creating self-organized community networks, and developing clever distribution strategies. For our inaugural Virtually Maker Faire, makers representing 25 countries will share over 350 presentations, demonstrations, and online project exhibits. Programming is curated into five tracks: Community Organizing, Learning & Teaching, Re-Thinking the Future, Design & Production, and Making.
Virtually Maker Faire is a stage for makers to connect, share, and learn with each other and a broader public, and show how the community fostered by Maker Faire has sprung into action, using their skills and talents to solve for human needs.
Plan out your virtual day with the full schedule or meet some of our fantastic makers.
Upcoming Session Highlights
Check session pages or the schedule for updated times.
Making a Global Movement in Crisis: the Story of Open Source Medical Supplies
Gui Cavalcanti, founder of Open Source Medical Supplies, will talk about the role of Open Source in the pandemic and how their group documented the global fabrication of over 7 million units of personal protective equipment, medical and community supplies.
View Session
How Making 3D Printers Widely Available Enabled Covid-19 Solutions: From RepRap to Prusa
Maker Faire Founder Dale Dougherty will talk with RepRap's Adrian Bowyer and Josef Prusa of Prusa Research about the rise of 3D printing and how getting 3D printing in the hands of more people enabled so many of the PPE solutions from the maker community, including developing and testing the Prusa Face Shield and its spread around the world.
View Session
DIY Heroes: Meet the Makers Featured in Make: Vol. 73
The new issue of Make: magazine looks at the maker response to the COVID-19 pandemic. Join Make:’s Executive Editor Mike Senese and the editorial team as they discuss the new issue with the various subjects that are profiled in its pages.
View Session
Pivoting in the Pandemic — Adafruit NYC
Adafruit founder Limor Fried will talk about pivoting production smartly and safely during the pandemic, from making face shields to essential electronic components as their home town of New York City became a hot spot for the virus.
View Session
How to Use Social Media as a Maker Portfolio
Panelists Ana Karen Ramirez, Estefannie Explains It All, Jen Schachter, and Xyla Foxlin will discuss how to leverage social media to showcase your work, create your own maker community, and give a glimpse of the behind the scenes of your processes.
View Session
ArcAttack's Tesla Coil Music
Tesla coil music live-streamed from ArcAttack’s shop as a Grand Finale to Virtually Maker Faire!
View Session
Wednesday, May 20, 2020
Making Personal Protective Equipment & Plan C
Delivered 8,616 PPE articles, including 3,261 face shields.
100+ hospitals and clinics have received PPE, including facilities in California, Arizona, Colorado, Georgia, and the Navajo Nation.
Thanks to additional volunteers, 425 sewn masks were made and donated. And! These masks can be ordered at SD Print 4 Cause.
Making PPE, at home, while doing all of our usual jobs, like programming, schooling, gardening, chicken wrangling, goat herding, cat grooming, cooking, cleaning... It's a lot! We would like to document all of our work, with tutorials, and we need to create some kind of exhibit-virtual presentation for Maker Faire (yikes). In the meantime, if you'd like an idea of what we have been doing, please look for us at Instagram, @boomNerds, and follow our volunteer friends, where we post on FaceBook as "San Diego 3D Printing for a Cause & Friends."
Please! Our work is urgent and meant to save lives...
if you can, Follow, Like, Share, Donate,
we would be so thankful!
Support helps and we appreciate all of it!
Thank you.
Monday, November 25, 2019
BOoM Emporium
This is all new to us. Thank you for your patience and feedback. And thank you for visiting our shop, and telling your friends about it, spreading the word, sharing our name.
Make Shop Opening Today at Noon PST
This link will show you some of the items that will be available.
Saturday, November 16, 2019
Coming Soon :: Maker Shop
Yes.
You see, I've been designing and carving stamps, and then using them to print on fabric. A nice thing to come of all of this... many friends have asked me to open a shop, make the napkins, aprons, and tea towels available for purchase. I even took a special request to carve a goat!
I've been busy and I've managed to print a good amount, and I would like to make them available before Thanksgiving. Gee, nothing like creating my own holiday rush! So, without a shop, or a shop name, or mailing envelops, before I figure out PayPal, or Venomo or Carrier Chickens... I am about to launch the business end of a little cottage industry. I am hoping that by announcing this now, and sharing some previews, I will push myself into figuring out the bureaucracy and formal aspects of being a working artist. Another hope is that some clever and dear friends may share their tips and suggestions for handling sales, pricing, packing, exfoliating, and reducing fine wrinkles. Just kidding about exfoliating, but I could probably use some ironing tips... 100% cotton is hard to keep pressed!
I am going to share some samples of what I have been making, but I am not taking any orders until I can be certain of how I will take payments, and handle deliveries. So! Before I am OPEN I will announce an official day and time, and accept orders, then.
Designing, carving, and printing has been a lot of fun, and I appreciate how encouraging friends have been. I will be back with an update as soon as possible!
Subscribe to:
Posts (Atom)